
Zoom is a cloud-based service which provides simple online meetings, content sharing, and video conferencing capabilities. You do not need a Zoom account to attend a Zoom meeting and only the host is required to have an account to enable the scheduling of meetings. All staff and students can use their EdUHK accounts to log into Zoom.
This service is accessible in Hong Kong, overseas as well as in mainland China. Staff can host Zoom meetings and Webinars with up to 500 participants. Students and functional account users can host Zoom meetings for up to 300 participants. Zoom supports platforms like iPhones, iPads, Androids, PCs and Mac.
Note: Users in mainland China must download the Zoom app and sign in through Microsoft’s single sign-on (SSO) service to join or host meetings. SSL VPN is not required. To download the app, please see "Download Zoom desktop client or Zoom mobile app".
The meeting host will need a PC, Notebook or MacBook with a web camera and microphone. It is recommended that users should wear a headset with a microphone for better audio quality.
- How to access and signup for a Zoom account?
- Schedule a meeting and share the Link
- Start a scheduled meeting
- Join Meeting using the link or Meeting ID (For Participants)
- How to share the Desktop or a Program?
- How to grant Co-host Role to a participant during the meeting?
- How to retrieve the attendance list for a Zoom meeting?
- How to enable virtual background?
- Retention Period for Zoom Recordings on the Cloud
- Zoom FAQs and Resources
- Zoom Online Help Center
How to access and signup for a Zoom account
Zoom allows you to access your account in multiple ways. The most common ones are through:
- Zoom website (https://eduhk.zoom.us)
- Zoom app on your desktop computer or mobile devices
Sign in from website
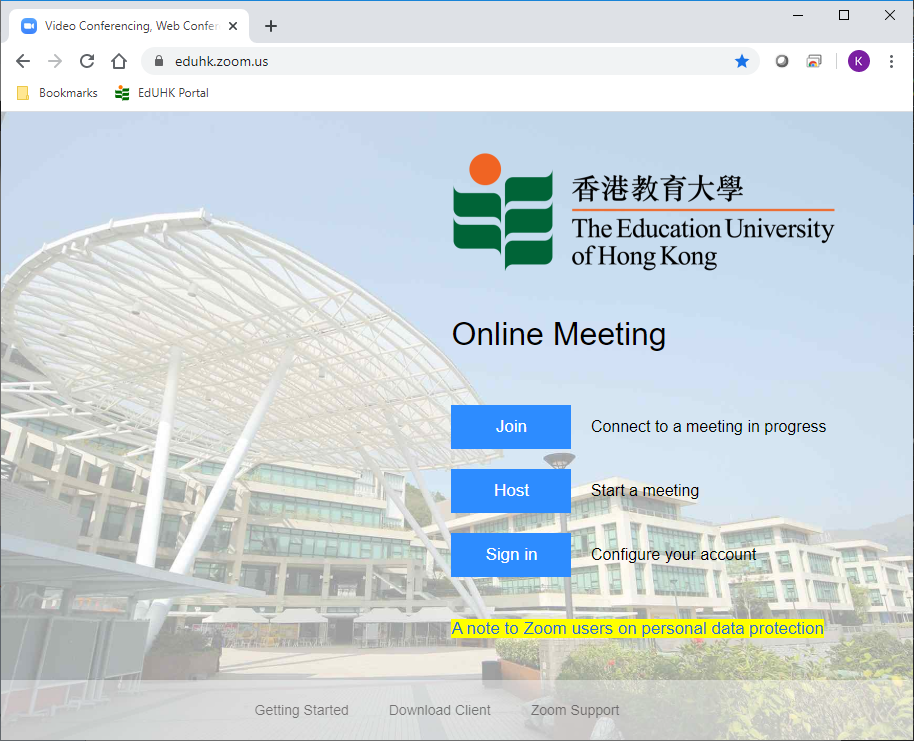
- Open any web browser and visit https://eduhk.zoom.us.
- Click "Sign In".
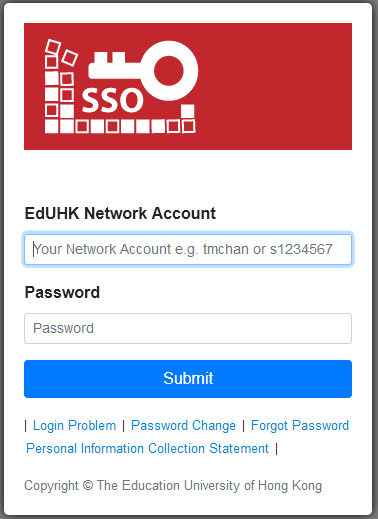
- Login with your EdUHK email address (i.e. username@eduhk.hk for staff and sxxxxxxx@s.eduhk.hk for students) and password.
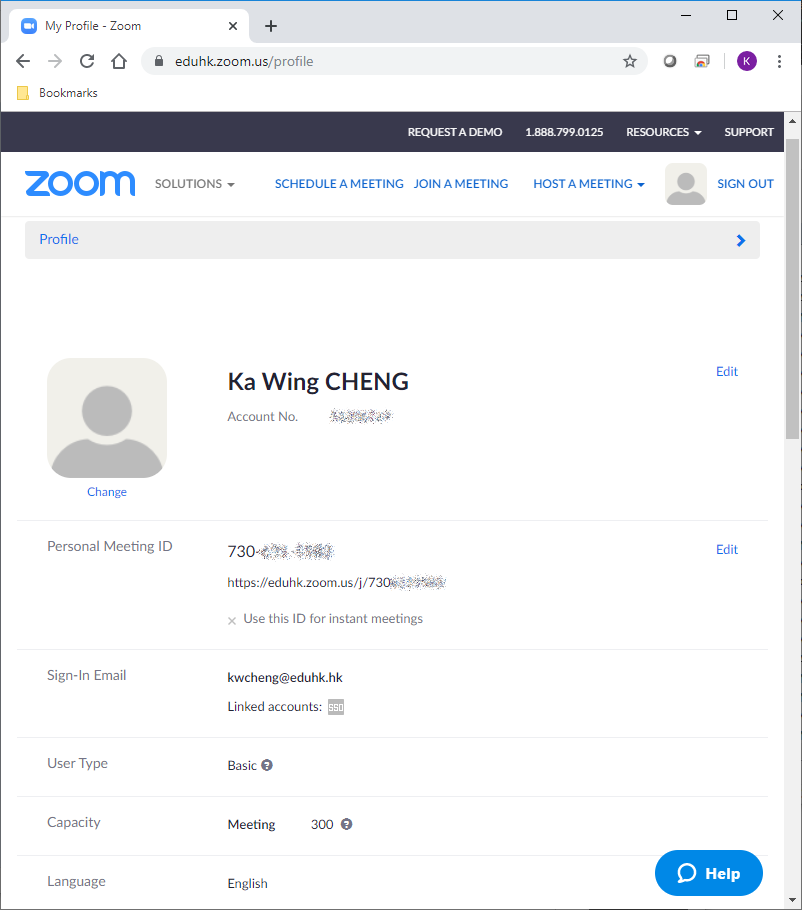
- The system landing page will be displayed after successful login.
Sign in from Zoom app
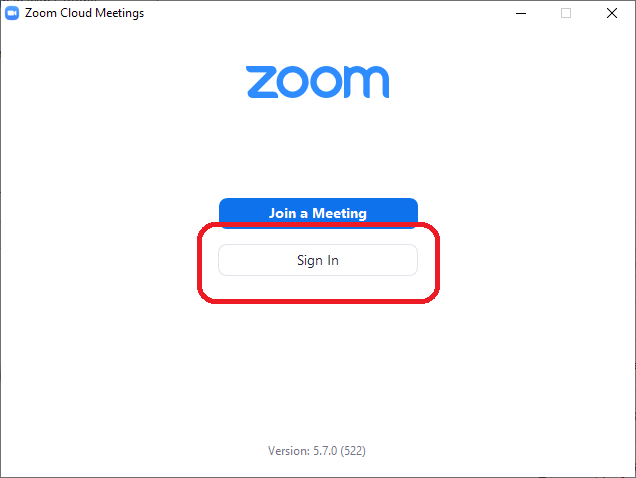
- Launch the Zoom app.
- Click "Sign In".
- From the "Sign In with" session, choose "SSO".
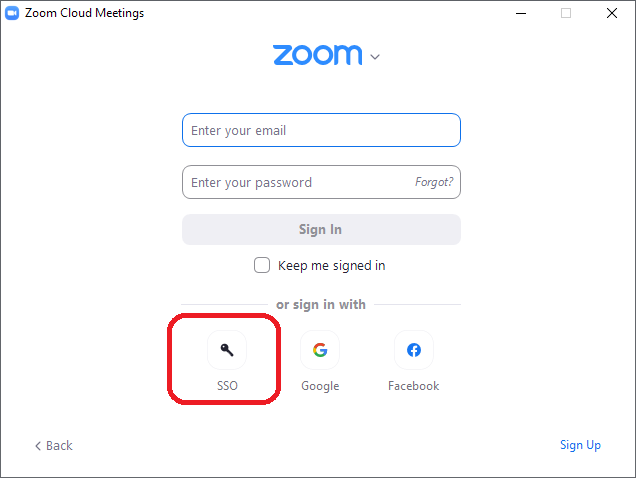
- Enter "eduhk" for the company domain and click Continue.
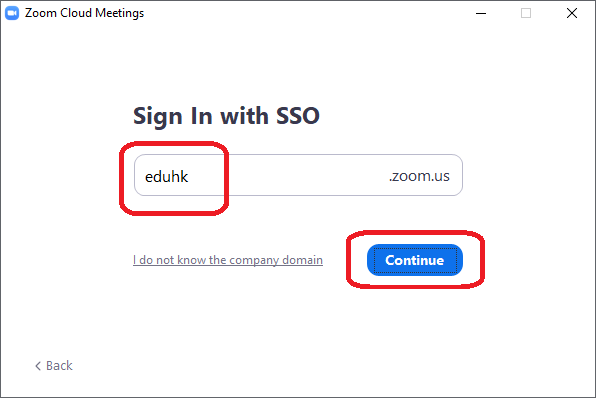
- Login with your EdUHK email address (i.e. username@eduhk.hk for staff and sxxxxxxx@s.eduhk.hk for students) and password.

- Click "Open Zoom Meetings" when your browser prompts for it.

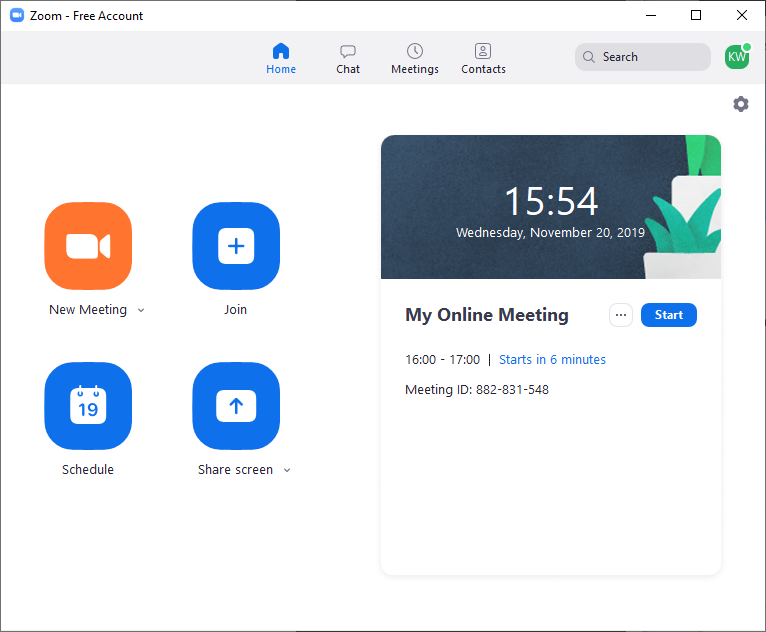
- The system landing page will be displayed after successful login.
Schedule a meeting and share the Link
To schedule a meeting on the Zoom website
- Log in Zoom with your EdUHK account.
- From the left panel, click Meetings and Schedule a New Meeting on the right hand side.

- Complete the details of your meeting. (Note: All scheduled meetings can be started by the host any time, regardless of the date and time settings.)
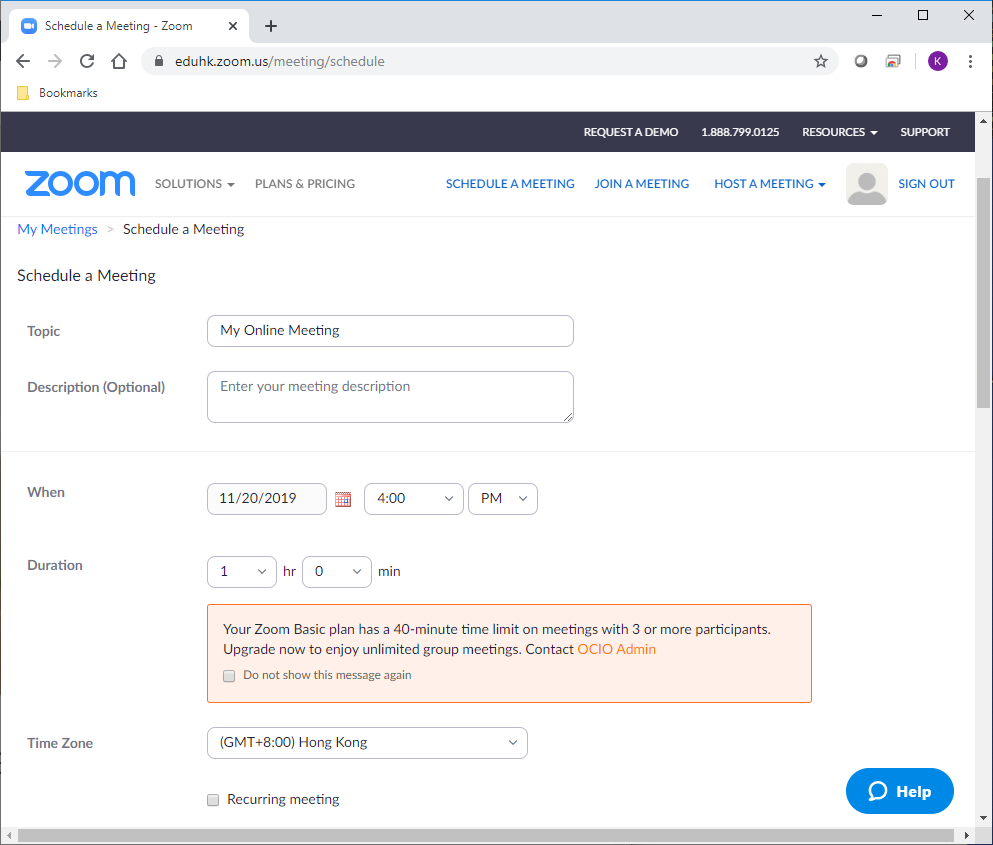
- Click "Save".
- The meeting summary page will be shown. You can add the meeting schedule to your calendar (Google / Outlook / Yahoo calendar).
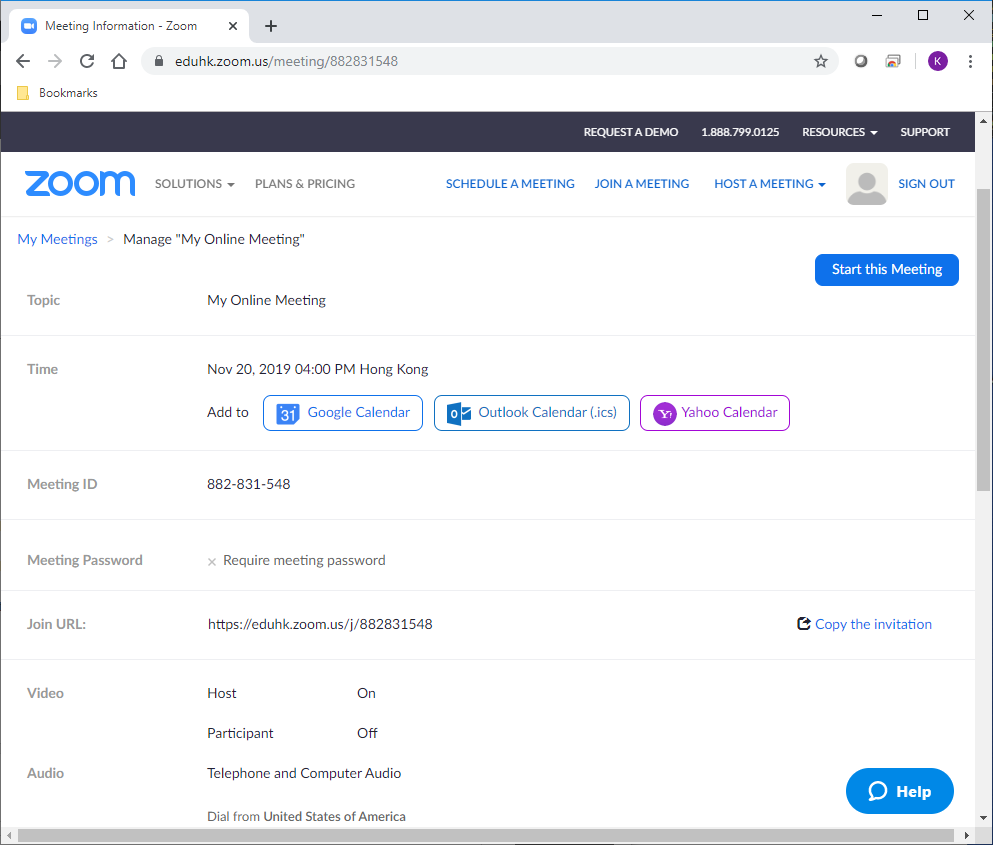
- Under the "Join URL:" session, click the "Copy the invitation". Then the invitation template will be shown. You can copy the message by clicking "Copy the invitation" and paste it on an email to your participants. (Note: You can notify participants either with the full URL (e.g. https://eduhk.zoom.us/j/xxxxxxxxx) or just the "Meeting ID" (the 9-digit number)).
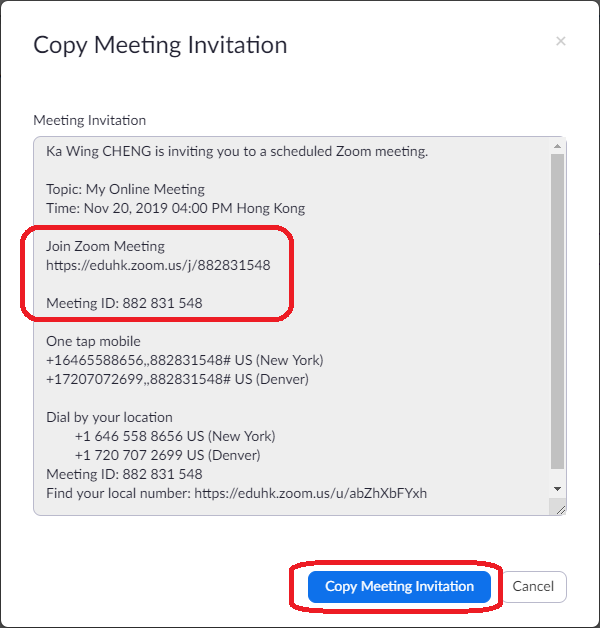
To schedule a meeting on the Zoom app
You must have the Zoom client installed on your computer. If not, please download and install the Zoom client at https://eduhk.zoom.us/download#client_4meeting.
- Open the desktop app and log in with your EdUHK account.
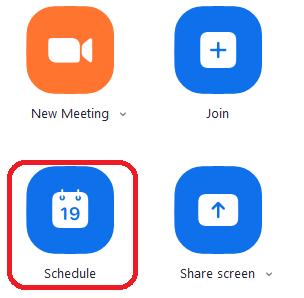
- Click the Schedule icon.
- Complete the details of your meeting. (Note: All scheduled meetings can be started by the host any time, regardless of the date and time settings.)
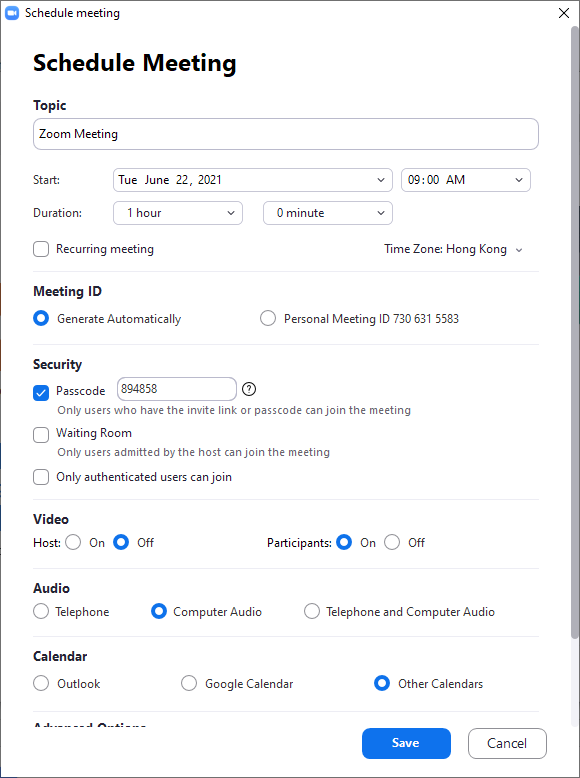
- Click Schedule.
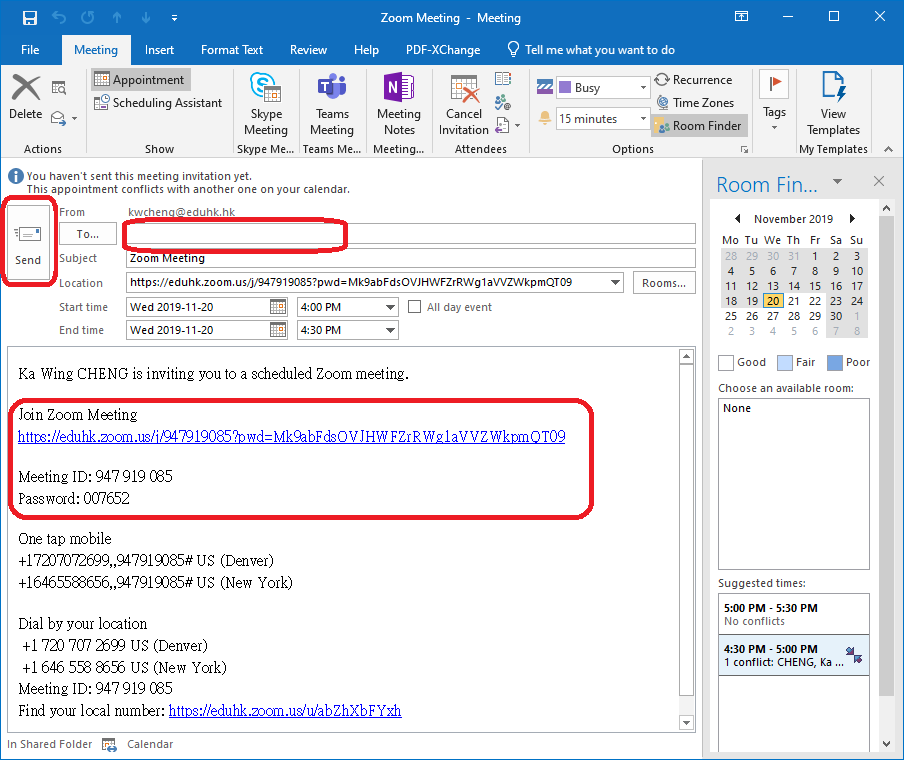
- The meeting request will be opened in Outlook and you can manually add your participants. Click "Send" to send the meeting appointment. (Outlook will add the appointment to your calendar as well.)
Start a scheduled meeting
To start a scheduled meeting that you created:
- Open the Zoom app on your desktop computer or mobile device .
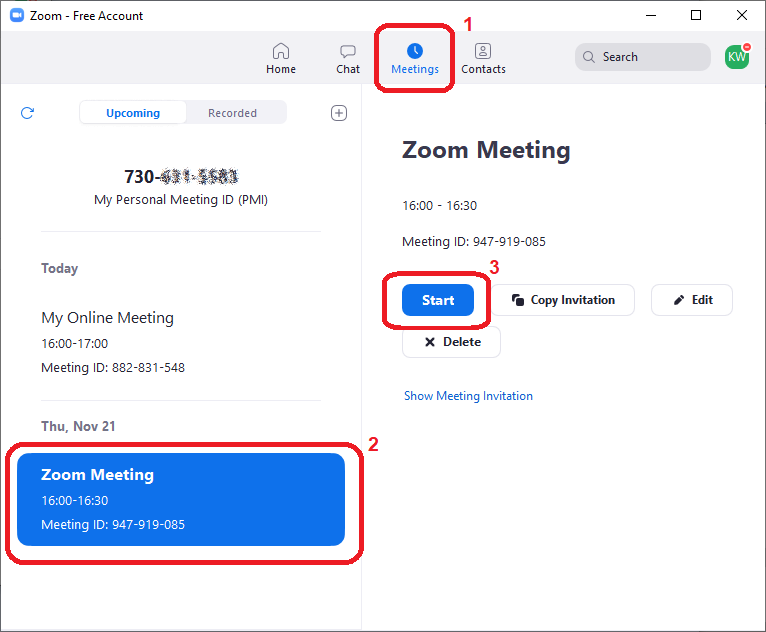
- Click Meetings.
- Hover over the meeting and click Start.
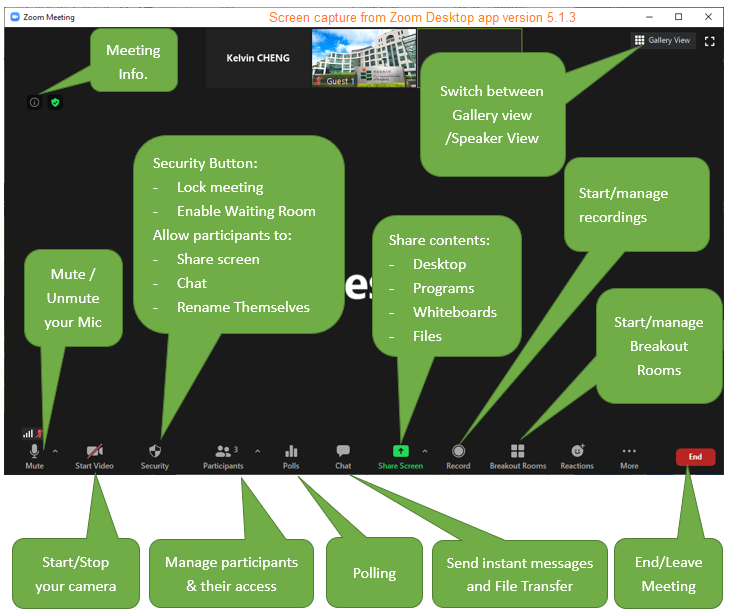
- You can manage participants, send IMs, turn on video, mute the mic, present content, leave the meeting, start a recording, change font size and color, end a meeting and invite others. The image below illustrates all the features available.
Join Meeting using the link or Meeting ID (For Participants)
To join a scheduled meeting that you have been invited to:
- Using the invitation link:
- Click the link in your invitation.

- Click the link in your invitation.
- Using the Meeting ID via Zoom client:
You must have the Zoom client installed on your computer. If not, please download and install the Zoom client at https://eduhk.zoom.us/download#client_4meeting.
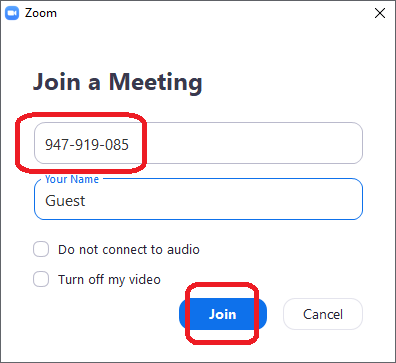
- Open the Zoom app on your desktop.
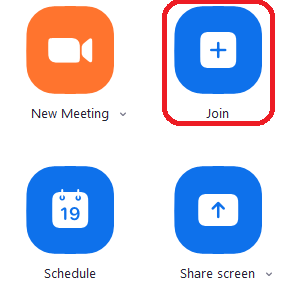
- Click Join.
- Enter the Meeting ID (this is located in the calendar invitation) and your display name.
- Click Join.
- Using the Meeting ID via the Zoom website:
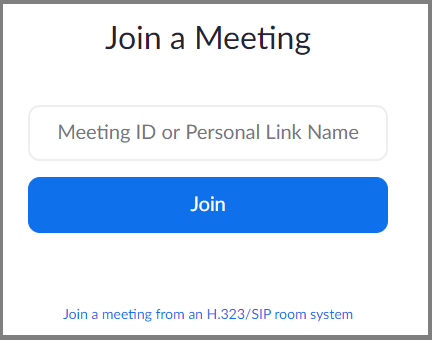
- Visit the Zoom website at https://zoom.us/
- Click "Join a Meeting".

- Enter the Meeting ID and click Join.
- Follow the instructions to download and install the browser add-in.
How to share your desktop or an application?
The meeting host can share the desktop or any application screen (e.g. PowerPoint) with the participants.
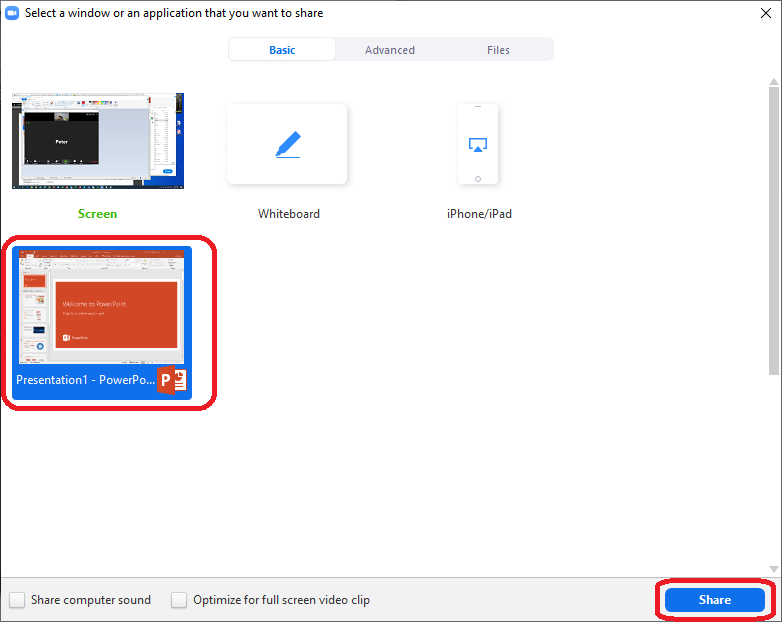
- First, open the application you want to share (e.g. PowerPoint).
- Click the "Share Screen" button on the control bar.

- Click on the application (e.g. PowerPoint) and click the Share button.
- Then you can start your PowerPoint in slide show mode (Press F5).
- To stop sharing, move your mouse pointer to the top of the screen. Click the "Stop Share". (Note: you can click Pause Share to freeze the screen too.)
How to grant Co-host Role to a participant during the meeting?
Hosts can grant the "Co-host" role to any participant. The Co-host feature allows you to share hosting privileges with another user in a meeting. This can be useful to allow another user to manage the administrative side of the meeting, such as muting participants or starting/stopping the recording.
- During the meeting, open the participants panel. Hover your mouse over a participant and click "More".
- Choose Make Co-host.
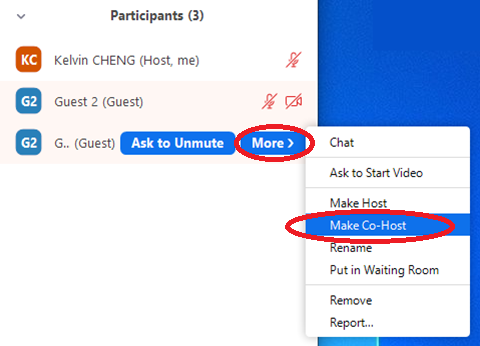
- Click Ok to confirm the permission assignment.
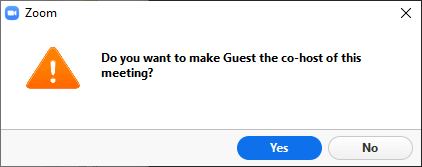
- From now on, that participant will have the "Co-host" role.
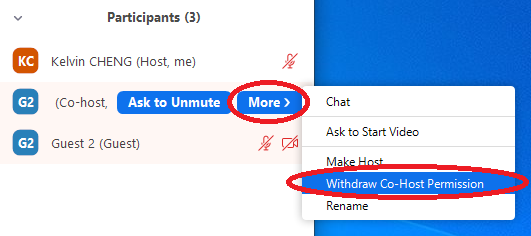
- To revert the role, hover on the name and click "More".
- Choose Withdraw Co-Host Permission.
There is only one host for a meeting. You can transfer the Host role to any participant. Once the role is transferred to a particular participant, you will lose control of the meeting.
How to make someone else the presenter in a Zoom meeting?
There is no need to “pass the ball” in Zoom. All participants can present at any time by sharing their screen. For details, please visit "How Do I Share My Screen?".
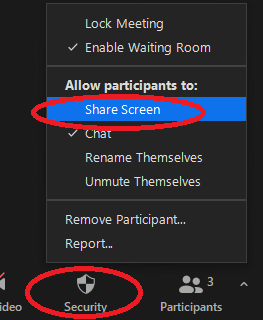
On the contrary, if you don't want to allow participants to share their screen, you can change the setting to allow only the host to share. Please follow the steps below:
- Click the "Security" button.
- Then un-tick the option “Share Screen” under “Allow participants to:"
How to enable Virtual Background?
The virtual background feature allows you to display an image or video as your background during a Zoom Meeting. This feature works best with a green screen and uniform lighting for better face detection.
You can also upload your own image or video as a virtual background. There are no size restrictions when adding your own virtual backgrounds, but we recommend cropping the image to match the aspect ratio of your camera before uploading it.
For details, please visit "FAQ: How to enable Virtual Background for the Zoom meeting?" on the system requirements and procedures.
EdUHK Zoom Virtual Background Templates
The Communications Office has prepared 4 Zoom virtual background templates for EdUHK members. These 4 templates are preloaded into the Zoom app. If you cannot find them or have accidentally deleted any of them, you can download from the links below. (Note: Virtual background is not supported on Android devices.)
 |  |
- *Right click on the link and choose Save link as...
- Version A - EdUHK Zoom Photo
- Version B - EdUHK Zoom Drawing
- Version C - EdUHK Zoom Orange
- Version D - EdUHK Zoom Green
Retention Period for Zoom Recordings on the Cloud
For better use of University resources, all Zoom recordings created on the cloud from 1 Jan 2021 will be retained for 180 days only and they will be removed automatically afterwards. Cloud recordings created on or before 31 Dec 2020 will be kept until 1 Jul 2021. Users are recommended to back up the recordings and download them to their local drive if needed.
Please refer to the FAQ: How to download the recording from ZOOM cloud? for details.
Zoom FAQs and Resources
Please also see Zoom FAQ for more information.
There are user guides prepared by the Center for Learning, Teaching and Technology (LTTC) for staff and students on using Zoom:
- A Guide for Academic/Teaching Staff to Create/ Start a Zoom Online Lesson Through Moodle LMS
- A Guide for Student to Join a Zoom Online Lesson Through Moodle LMS
- FAQ in using Zoom for Online Teaching for Academic/ Teaching Staff
- FAQ in using Zoom for Online Learning for Students
- Support for Field Experience Supervisors and Students
Zoom Online Help Center
There are more information and instructions on the Zoom Online Help Center webpage too.
