The File and Printer Sharing for Microsoft Networks component allows other computers on a network to access resources on your computer by using a Microsoft network.
Printer share out on Windows XP (Host) - Simple Sharing (without password)
- Click Start -> Settings -> Printers and Faxes
- Then right click the printer icon that you want to share out and choose Sharing...
- Choose the option Share this printer and type in the Share Name in the text box.

- Then there will be a hand appear under the printer icon
 .Connect from Windows XP (Client side)
- Click Start -> Settings -> Printers and Faxes
- Double click Add Printer
- Select A network printer, or a printer attached to another computer when prompt
- Then input the path for the shared printer like \\computer_name\printer or using the browse function to locate the share printer.

- Follow the instructions to complete the setup.
Printer share out on Windows XP (Host) - Access Control List (with user password)
- For using Access Control List, you must disable Simple File Sharing first.
- Click Start -> Settings -> Printers and Faxes
- Then right click the printer icon that you want to share out and choose Sharing...
- Choose the option Share this printer and type in the Share Name in the text box.

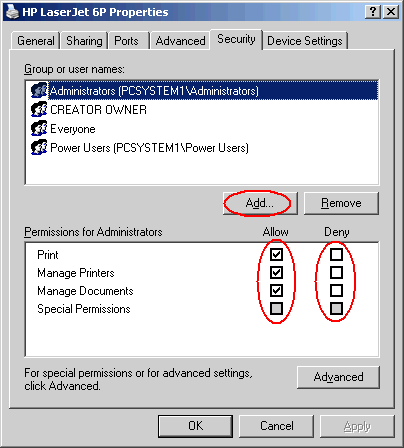
- Then change to the Security tab.

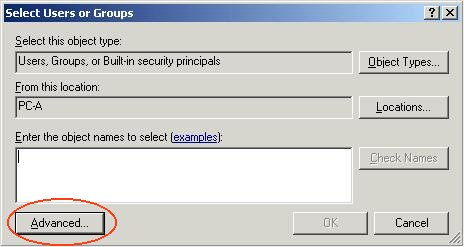
- Click the Add button to define the users that can access this folder.
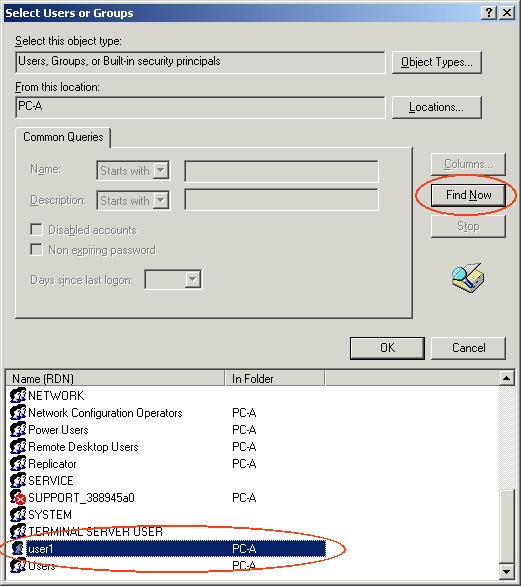
- From the Select Users or Groups windows click Advanced.

- Click Find Now to show all the user account exist on your PC. Then highlight the user and click the OK button to add the user in the list.

Note: The user account created in Windows XP must be the same user name with the client PC - Then highlight the Everyone group and click Remove. (Everyone group must be removed as it will allow guest to access this folder).
- Now you can adjust the Allow and Deny access right for this user.
- Press OK to confirm this operation.
- Then there will be a hand appear under the printer icon
 .Connect from Windows XP (Client side)
- You must logon the windows using a account which is exist in the Windows XP ACL.
- Click Start -> Settings -> Printers and Faxes
- Double click Add Printer
- Select A network printer, or a printer attached to another computer when prompt
- Then input the path for the shared printer like \\computer_name\printer or using the browse function to locate the share printer.

- Follow the instructions to complete the setup.
Note: Even the Simple sharing is easy to use but it is more risky to be attacked by virus or hackers with the use of Simple sharing in Windows XP to share out the printer than using Access Control List (ACL).

