Setup Procedures for iOS devices (iPhone/iPad/iPod Touch)
We recommend user to use Microsoft Outlook App to access your email. If you prefer to use other email client to receive email/Calendar/Contacts on your mobile device, please make sure the app app meets the minimum requirements for Multi-Factor Authentication (MFA) enabled account.
- Setup email account using Microsoft Outlook app. (Recommended)
- Setup email account using Apple Mail app.
Setup email account using Microsoft Outlook app.
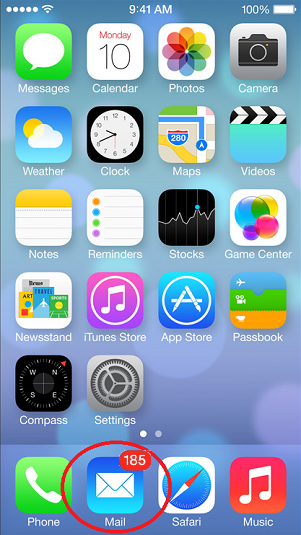
- Open Outlook for iOS
 . If you don't have it yet, download it from the Apple Store.
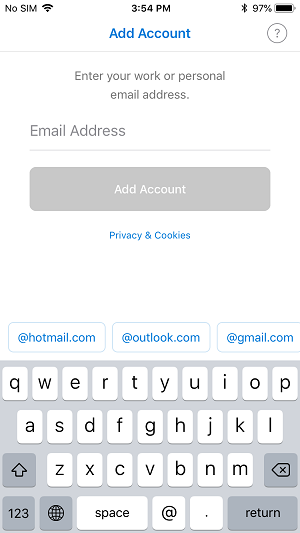
 - Enter your EdUHK email address when prompt. And press "Add Account".
- Enter your EdUHK password when prompt. And press "Sign In".

- If your account is enabled with Multi-Factor Authentication - MFA, you need to "Approve" the login from the Microsoft Authenticator app.
- Click "Maybe later" when prompt to finish the setup.

- You can choose whether to received notification for the Outlook App.

Setup email account using Apple Mail app.
Please make sure you can access the internet before the following procedures.
- (Screen capture based on iOS12.1)
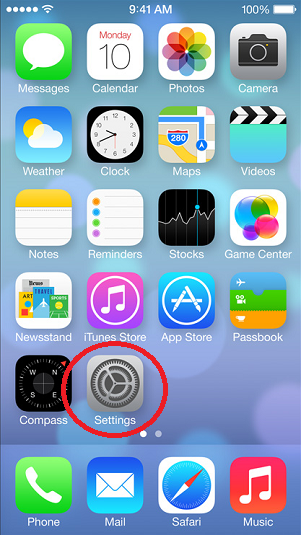
- Choose "Settings" from the Home screen.
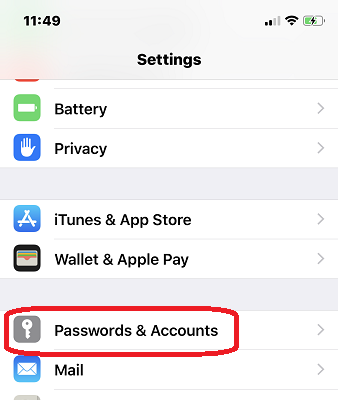
- Choose "Password and Accounts"
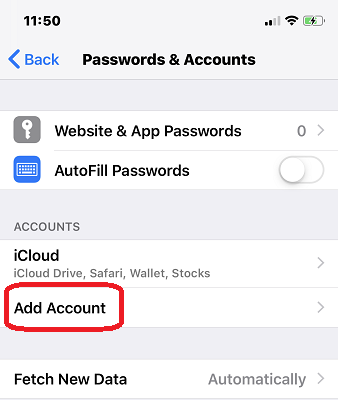
- Choose "Add Account".
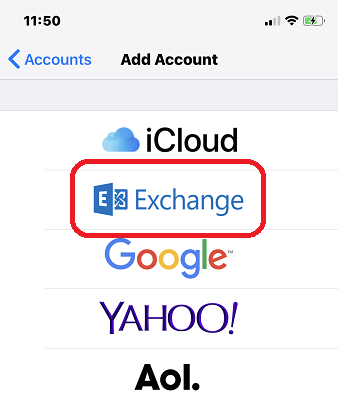
- Choose "Microsoft Exchange".
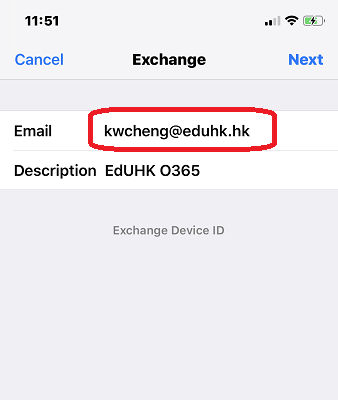
- Enter your full email address (e.g. username@eduhk.hk). Then tap "Next".
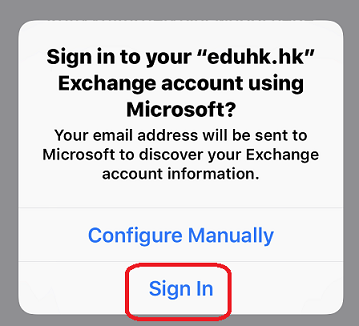
- Choose Sign In when prompt.
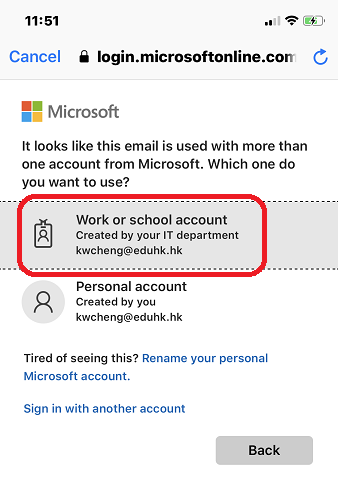
- Choose Work or School account for the account type.
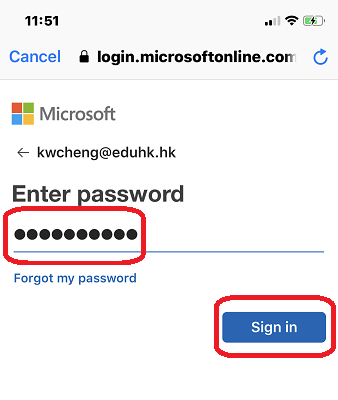
- Enter your email password when prompt. Then tap Sign in.
- If your account is enabled with Multi-Factor Authentication - MFA, you need to "Approve" the login from the Microsoft Authenticator app. (Note: If you are using iOS 9 or earlier, please update your iOS to the latest version. Otherwise, you have to use "App Password" rather than your EduHK password. If you can't recall it, please visit Create an app password for Office 365 MFA".
- After you have "Approve" the MFA, make sure to go back to "Settings". The "Approval sign in" screen will refresh and gone. If not, you may have to repeat the MFA request again.
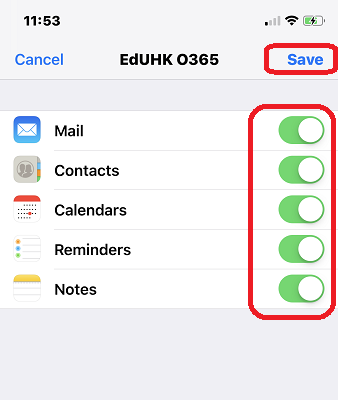
- Choose the item(s) that you want to synchronize. Then press "Save".
- Setup completes.
