To change your auto email signature in Outlook 2024/2019 (legacy layout), please follow steps below:
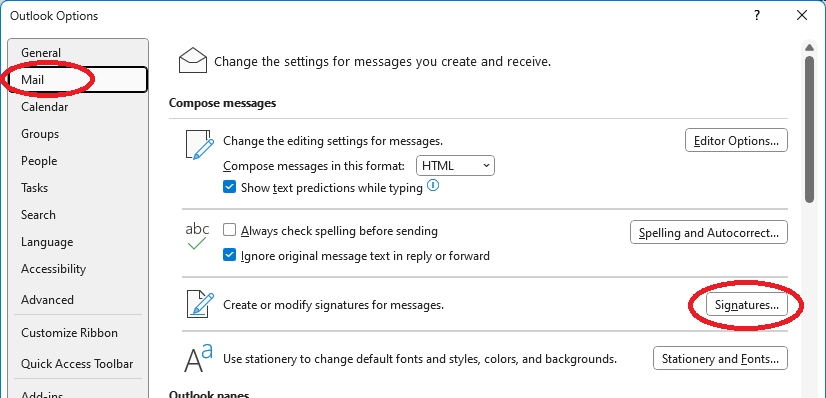
- From the ribbon bar, choose File -> Options.
- From the left panel, choose Mail.
- Then click the Signatures... button.

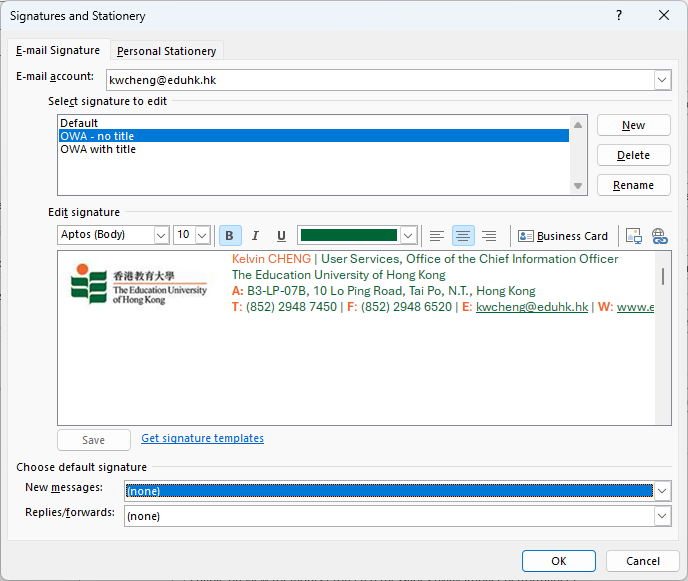
- Click the New button.
- Provide a name for your signature then click OK
- Type your signatures in the Edit Signature text box.
- When done, click OK.
To create signature:

Set Auto Signature:
- Under the session Choose default signature, set the signature you preferred for New messages: and Replies/forwards:.
- Then click the OK button.
- Now when you create a new email, replies or forward a email the signature you selected will be added in the email.
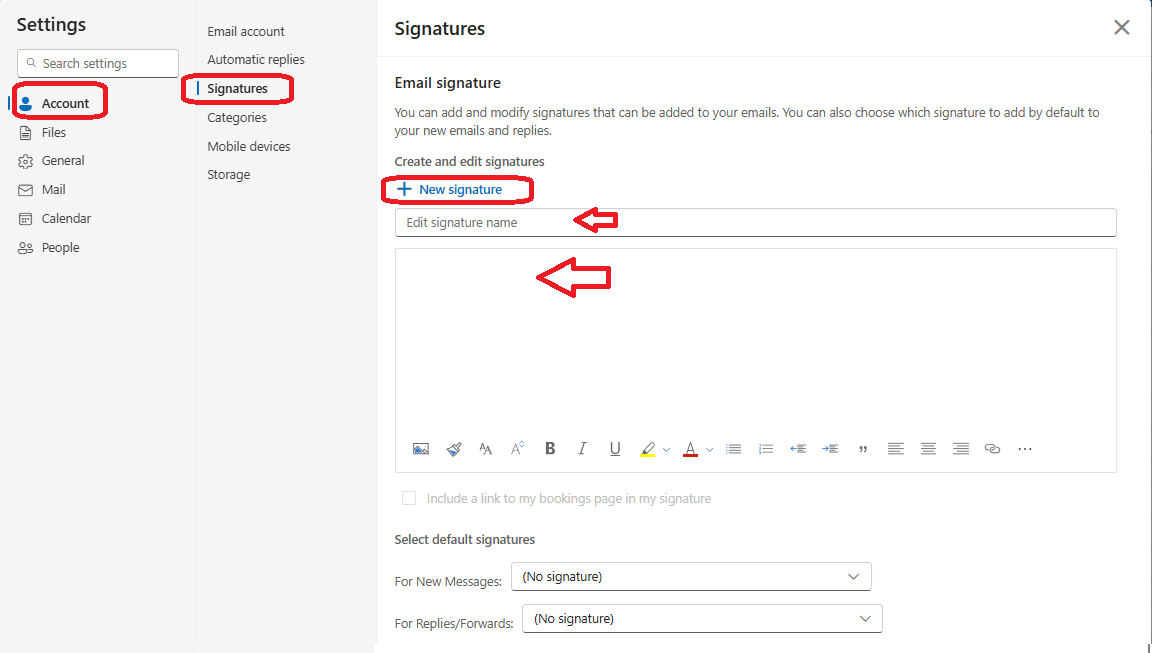
To change your auto email signature in Microsoft 365 (M365 web app), please follow steps below: (For the Outlook (new) app, click "Settings (the gear icon) > Account > Signature" (please refer to the screen of step 3).
- Login Microsoft 365 portal.
- Go the Outlook Web app.
- Click the gest icon from the top right hand corner.
- Click "Account > Signature".

- Click "+New Signature".
- Enter a Signature name.
- Type your signatures in the text box.
- When done, click Save.
- From the "Select default signatures" session, set the signature you preferred for New messages: and Replies/forwards:.
- Then click the Save.
- Now when you create a new email, replies or forward a email the signature you selected will be added in the email.
To create signature:
Set Auto Signature:

